

Setting up Google Authentication With Firebase🚀
Learn how to setup Google Authentication in your app the easy way!


A Bit About Me
Hey folks👋🏻, I am Karan Choudhary. A frontend developer passionate about web technologies and building things with code💻.
In this article, we will learn the easiest and the fastest way to setup Google Authentication with Firebase. So without wasting any time, let's get straight into it.
Why Firebase Authentication?
 Most apps need to know the identity of a user. Knowing a user's identity allows an app to securely save user data in the cloud and provide the same personalized experience across all of the user's devices.
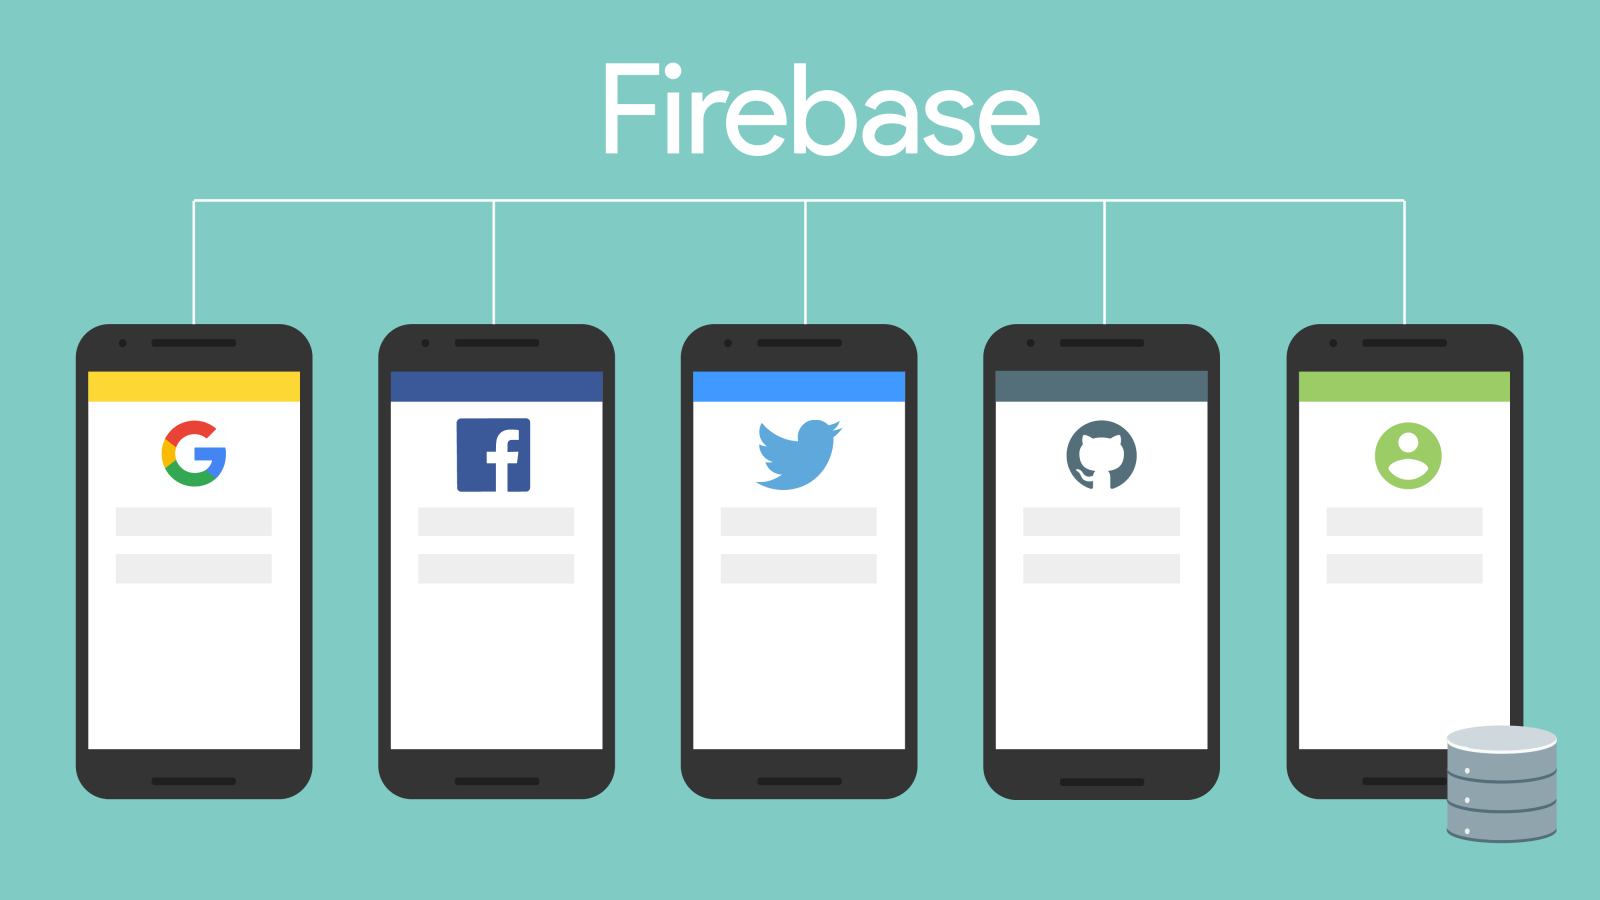
Firebase Authentication provides backend services, easy-to-use SDKs, and ready-made UI libraries to authenticate users to your app. It supports authentication using passwords, phone numbers, popular federated identity providers like Google, Facebook and Twitter, and more.
Firebase Authentication integrates tightly with other Firebase services, and it leverages industry standards like OAuth 2.0 and OpenID Connect, so it can be easily integrated with your custom backend.
Getting Started
Since we'll be needing some starter files for that. I've published a NPM package for easy build setup. Or else you can just clone the GitHub Repository.
Installation⚒️
You’ll need to have Node 10.16.0 or later version on your local development machine. I recommend using the latest LTS version.
To create a new app, you may choose one of the following methods:
npm
- Install the package
npm i firebase-auth-app
- Create a project using Firebase-Auth-App CLI
firebase-auth-app
- Install dependencies
npm install
git
- Clone the repository
git clone git@github.com:itskaranchoudhary/firebase-auth-app.git
- Change the working directory
cd firebase-auth-app
- Install dependencies
npm install
It will create a directory called firebase-auth-app inside the current folder.
Inside that directory, it will generate the following project structure and install the required dependencies.
File Structure
├── src/
│   └── assets
│   └── scripts
│   └── styles
│   └──favicon.ico
├── .gitignore
├── firebase.json
├── index.html
├── package-lock.json
└── package.json
├── README.md
├── LICENSE
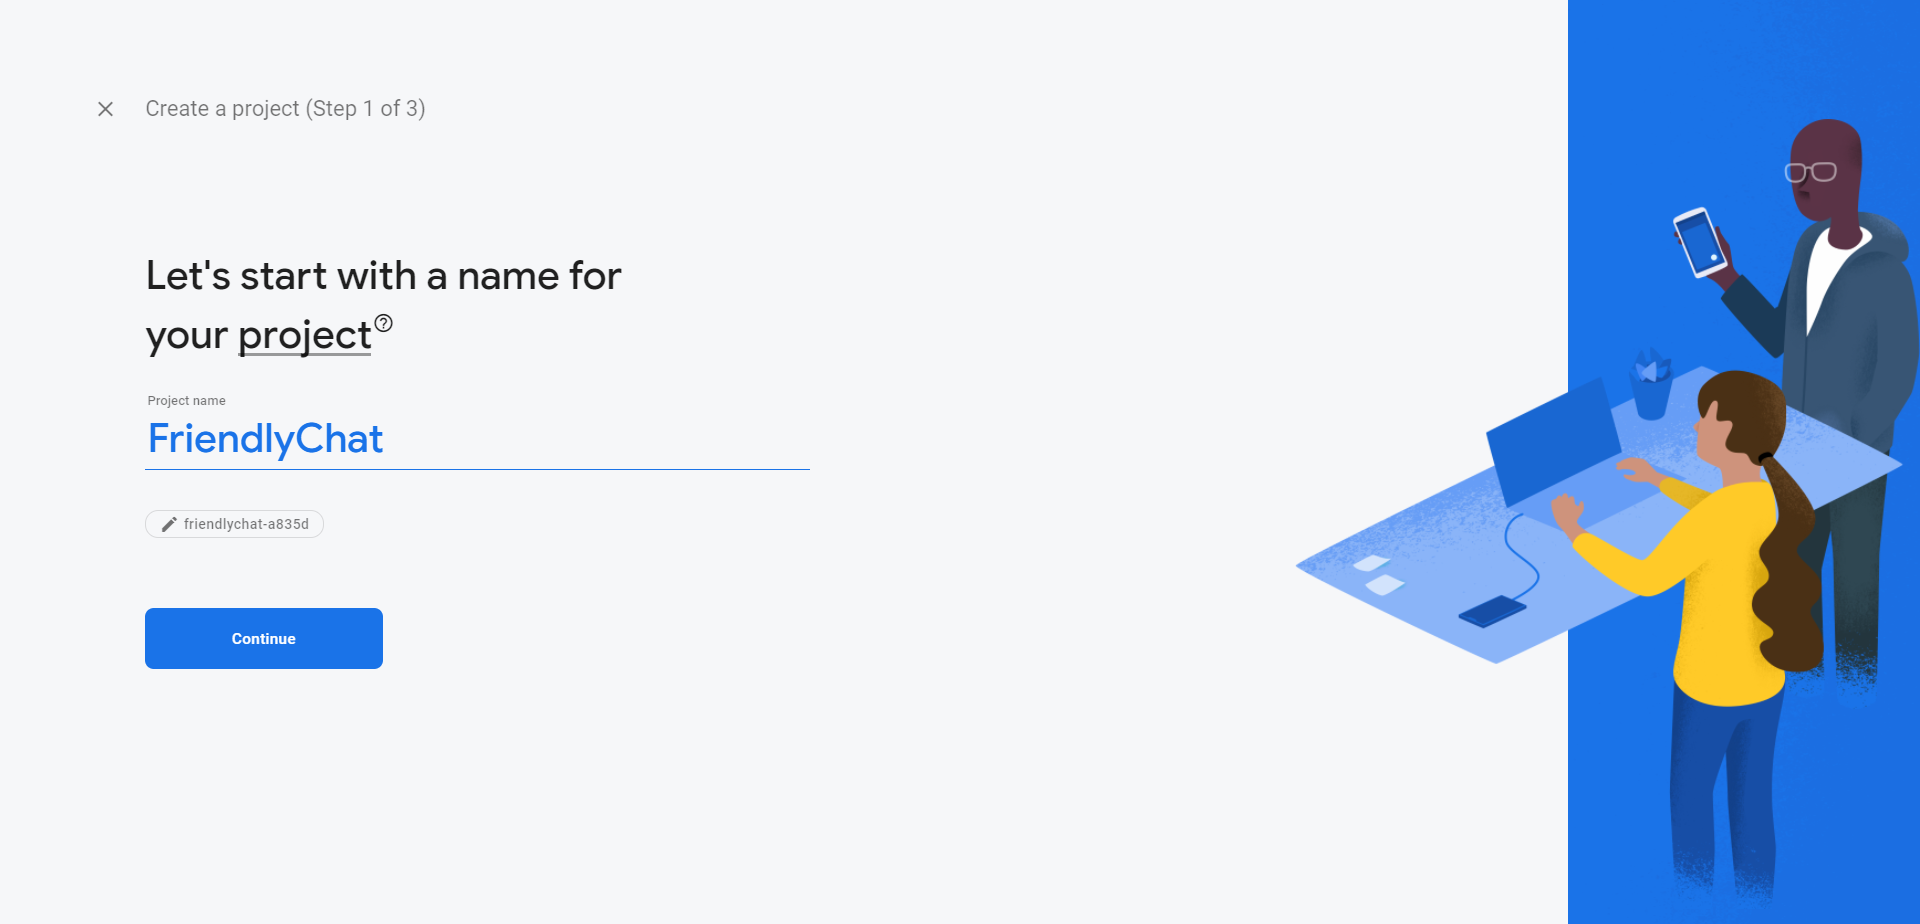
Creating a Firebase Project
First of all, go to you firebase console and Create a new project.
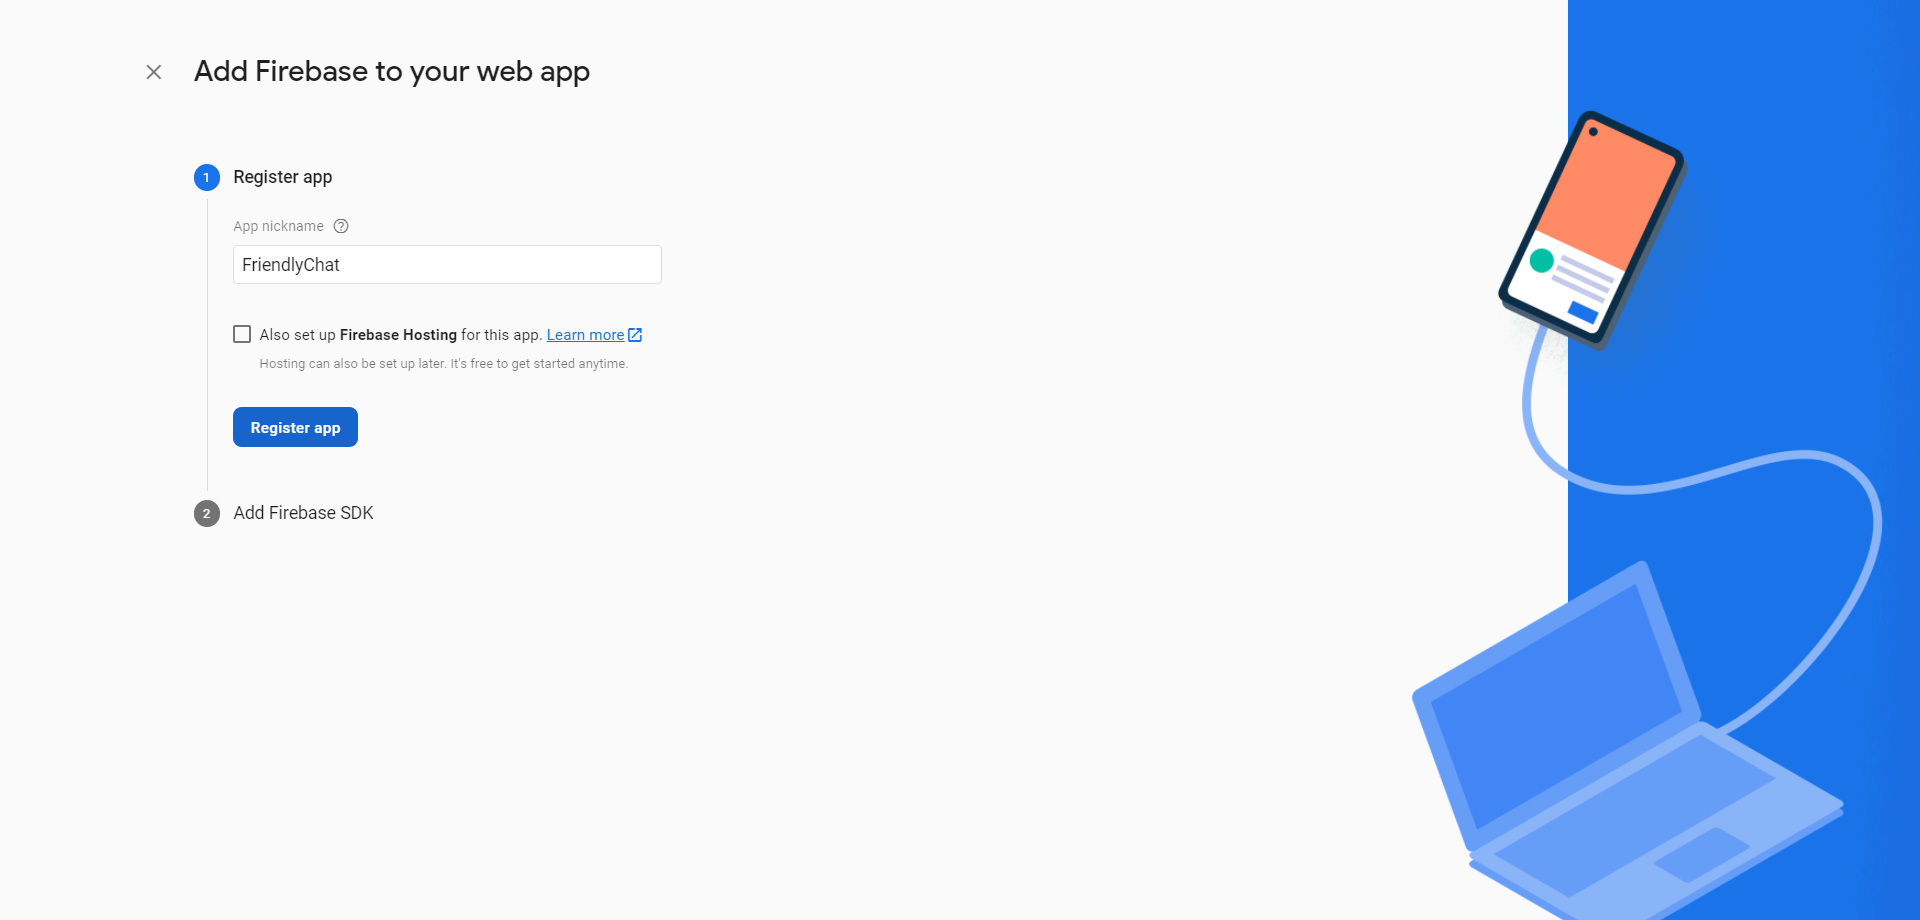
After creating a project, click on Web button to register your web app.  Enter the name of your web app and that's it.
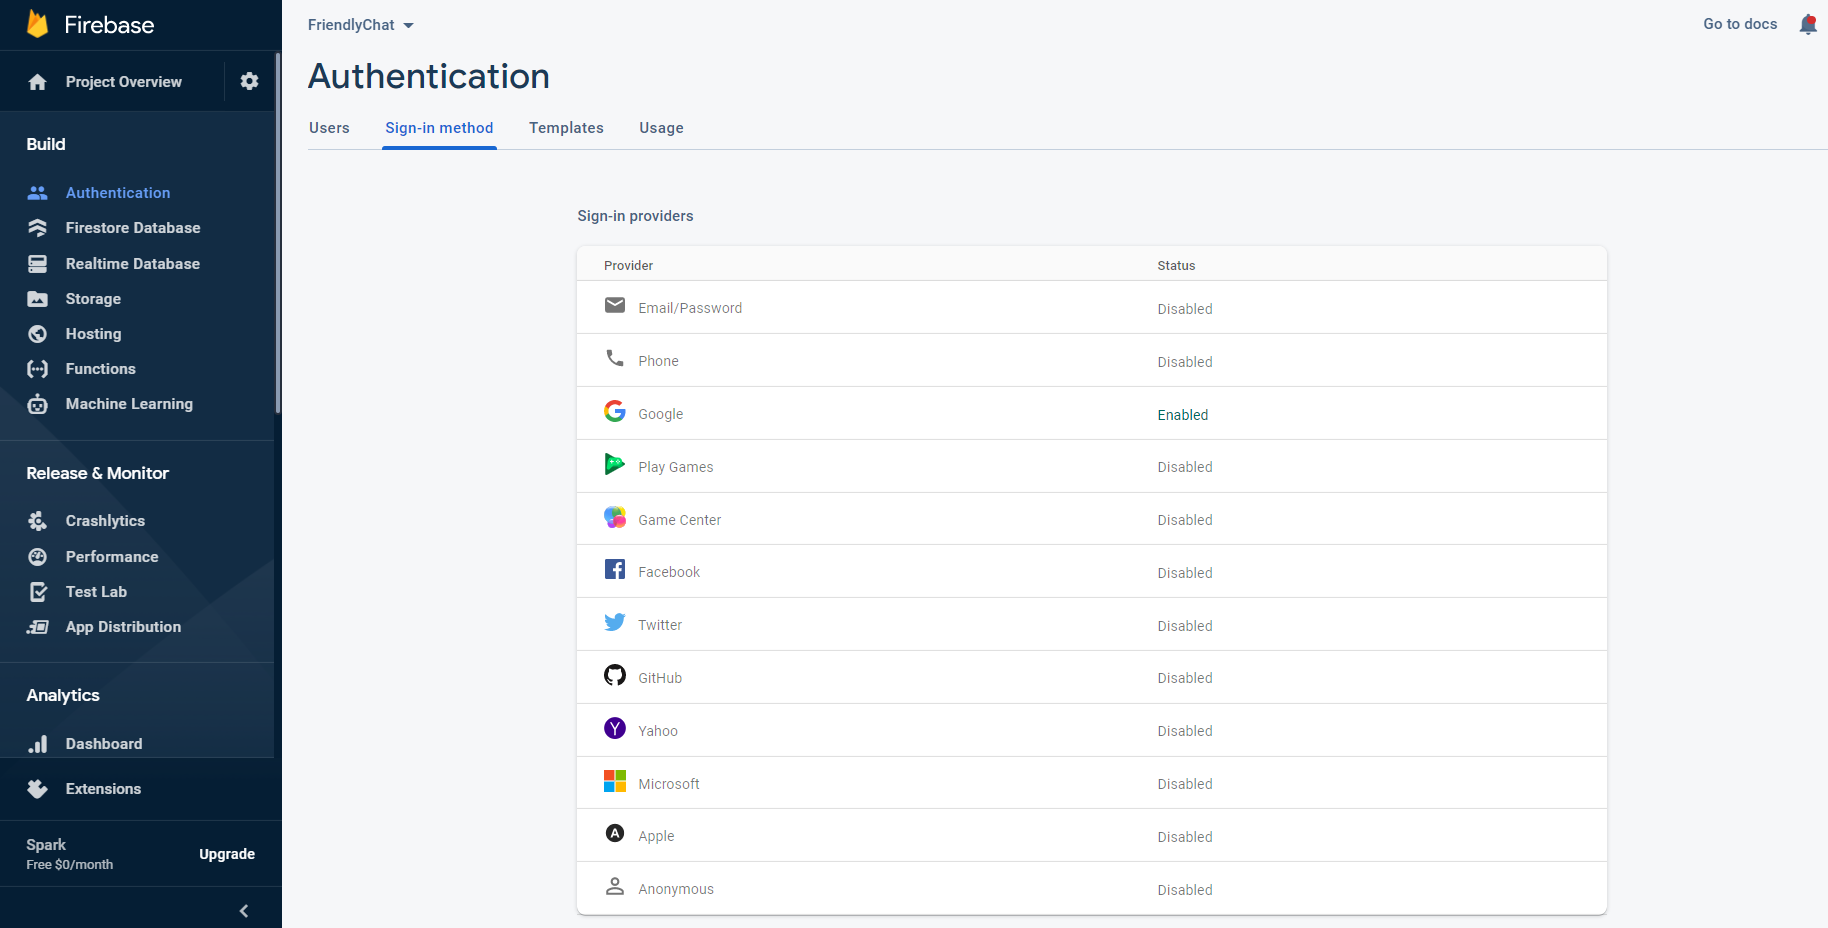
Enabling Google Authentication
Since you have added the web app, enable the Google Sign-Up Method under the Authentication/Sign-In Method/Sign-In Providers
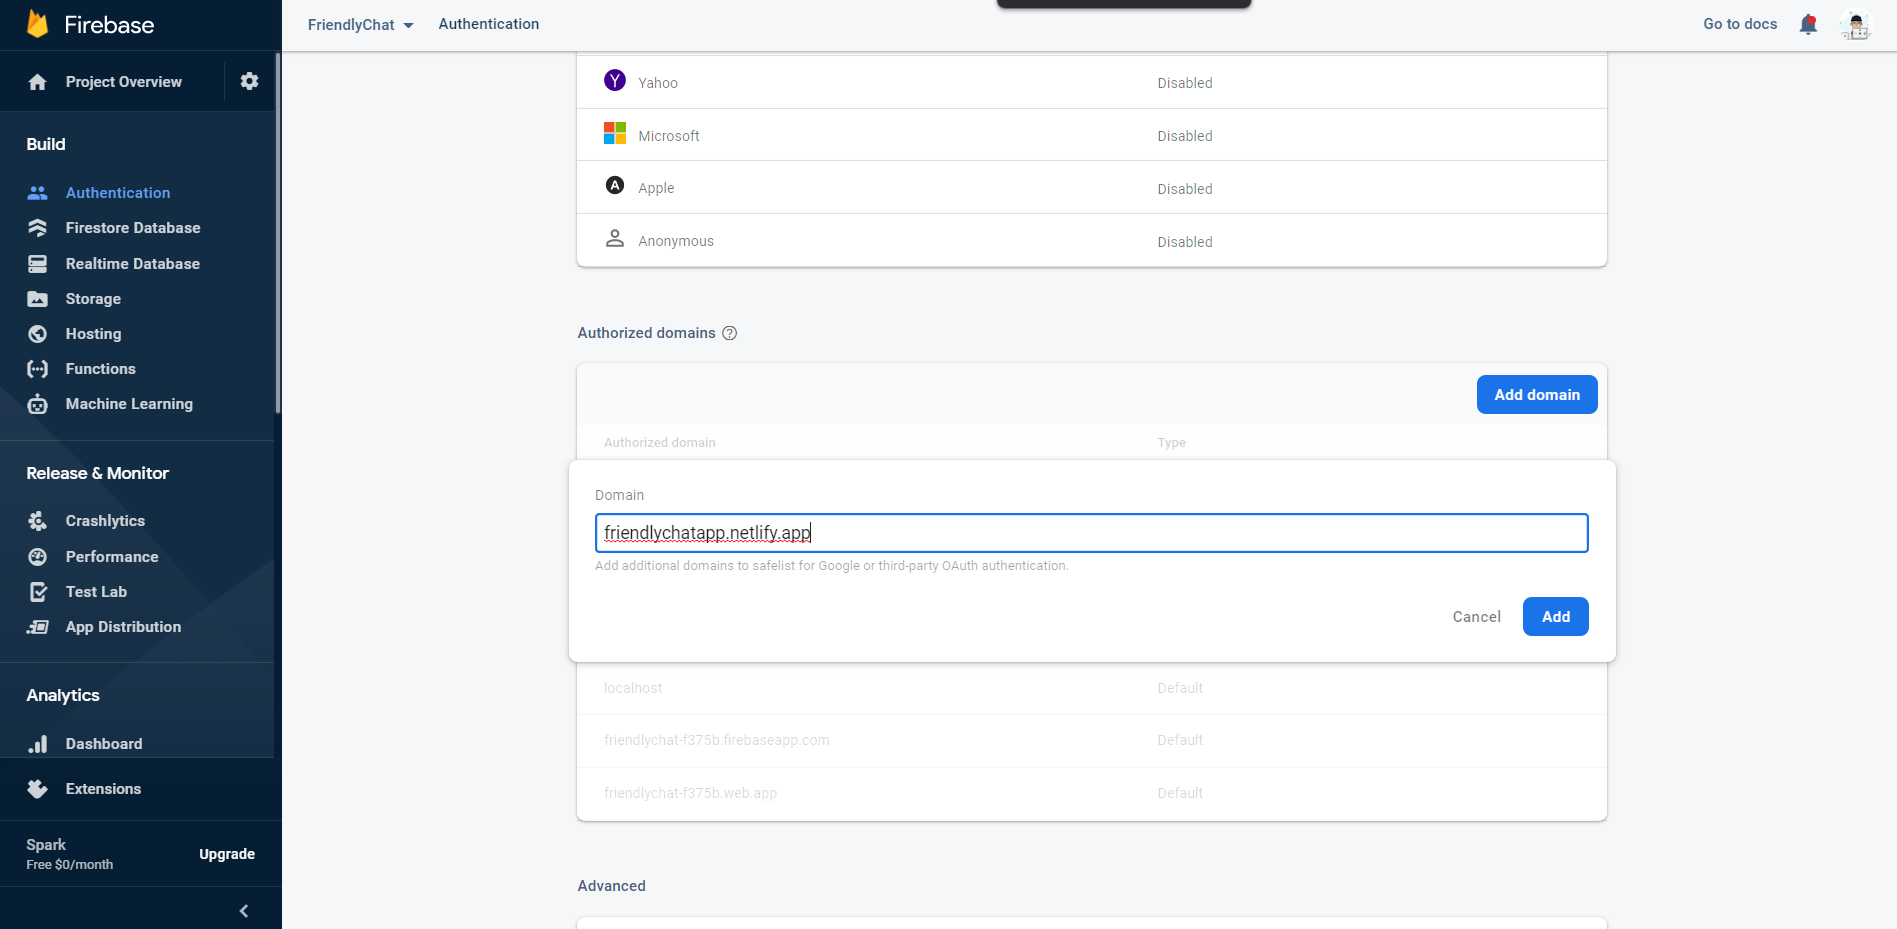
Adding the Authorized Domain
Since Firebase Auth doesn't work with live server. You'll have to manually add the domain you would be deploying your app to.
Go to Authentication/Sign-In Method/Authorized Domainsadd your domain.
Firebase Config
Now, go to Project Settings > SDK Setup and Configuration to get your firebaseConfig.
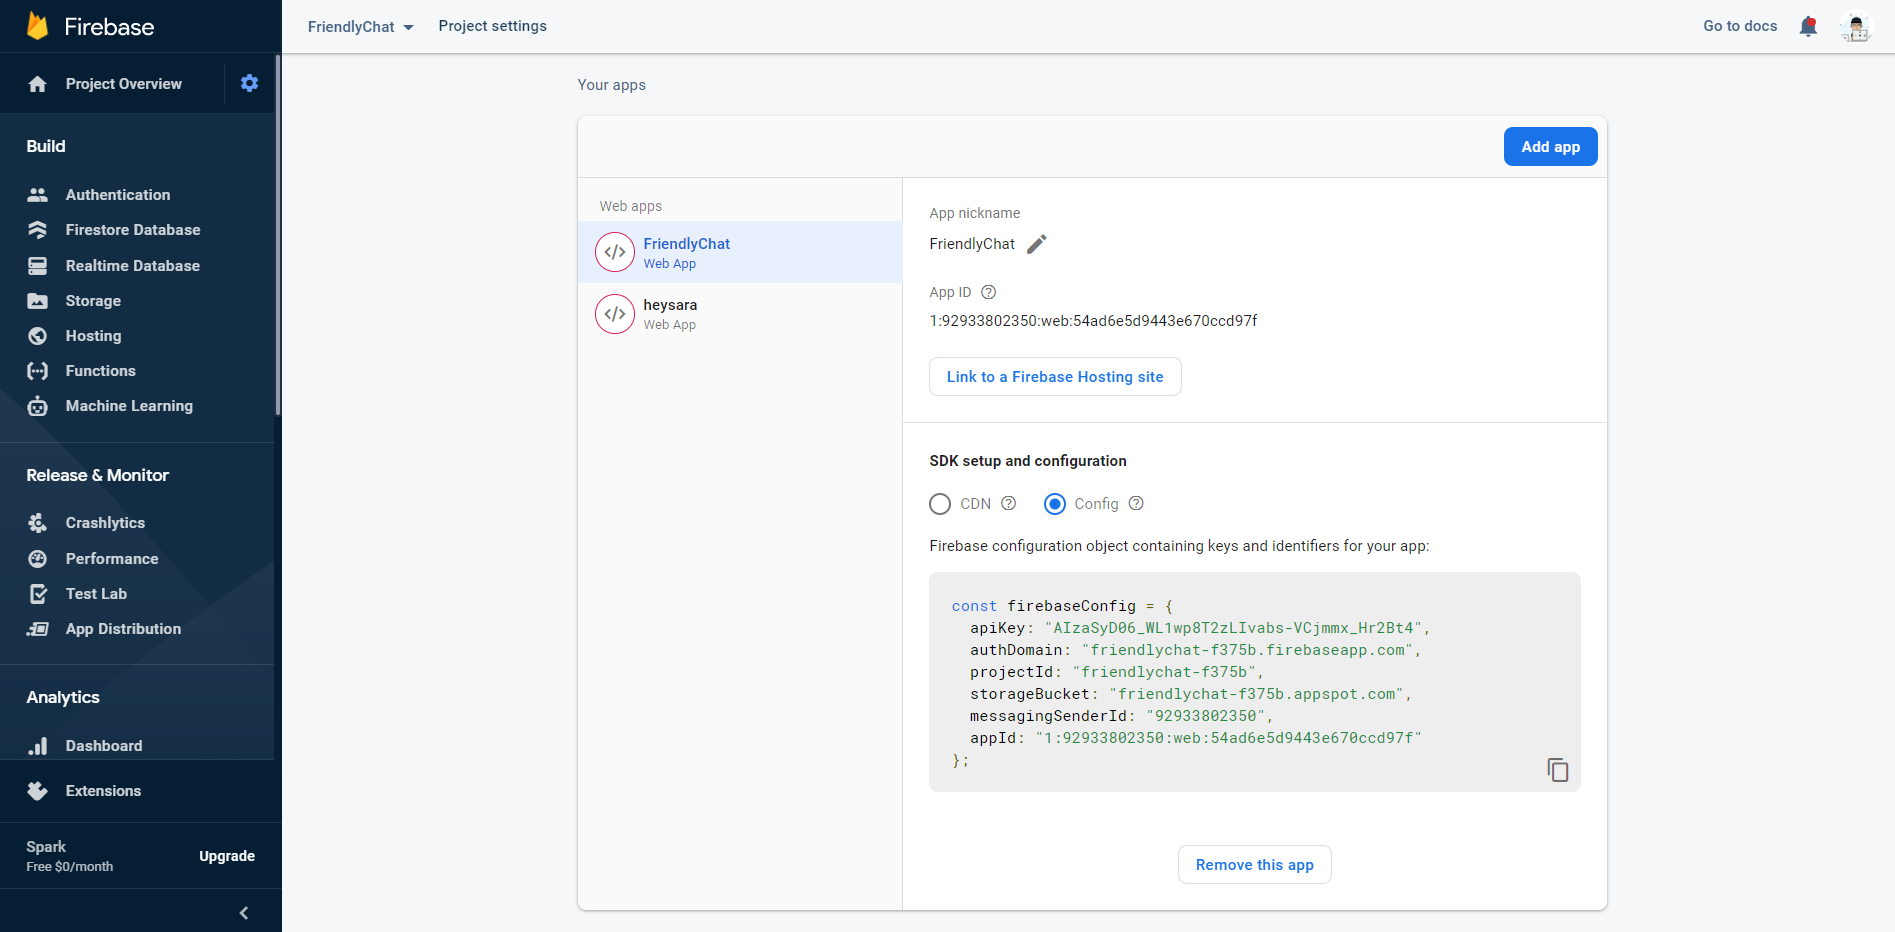
It should look something like this
var firebaseConfig = {
    apiKey: "API_KEY",
    authDomain: "PROJECT_ID.firebaseapp.com",
    databaseURL: "https://PROJECT_ID.firebaseio.com",
    projectId: "PROJECT_ID",
    storageBucket: "PROJECT_ID.appspot.com",
    messagingSenderId: "SENDER_ID",
    appId: "APP_ID",
    measurementId: "G-MEASUREMENT_ID",
  };
Copy the config and paste it into index.html > script tag.
🌟 You are all set!
Testing the App
To test the app, we need to deploy it to the domain we have added in the firebase console.
Since, I have already deployed my app. I can visit friendlychatapp.netlify.app to check if the authentication is working properly or not.
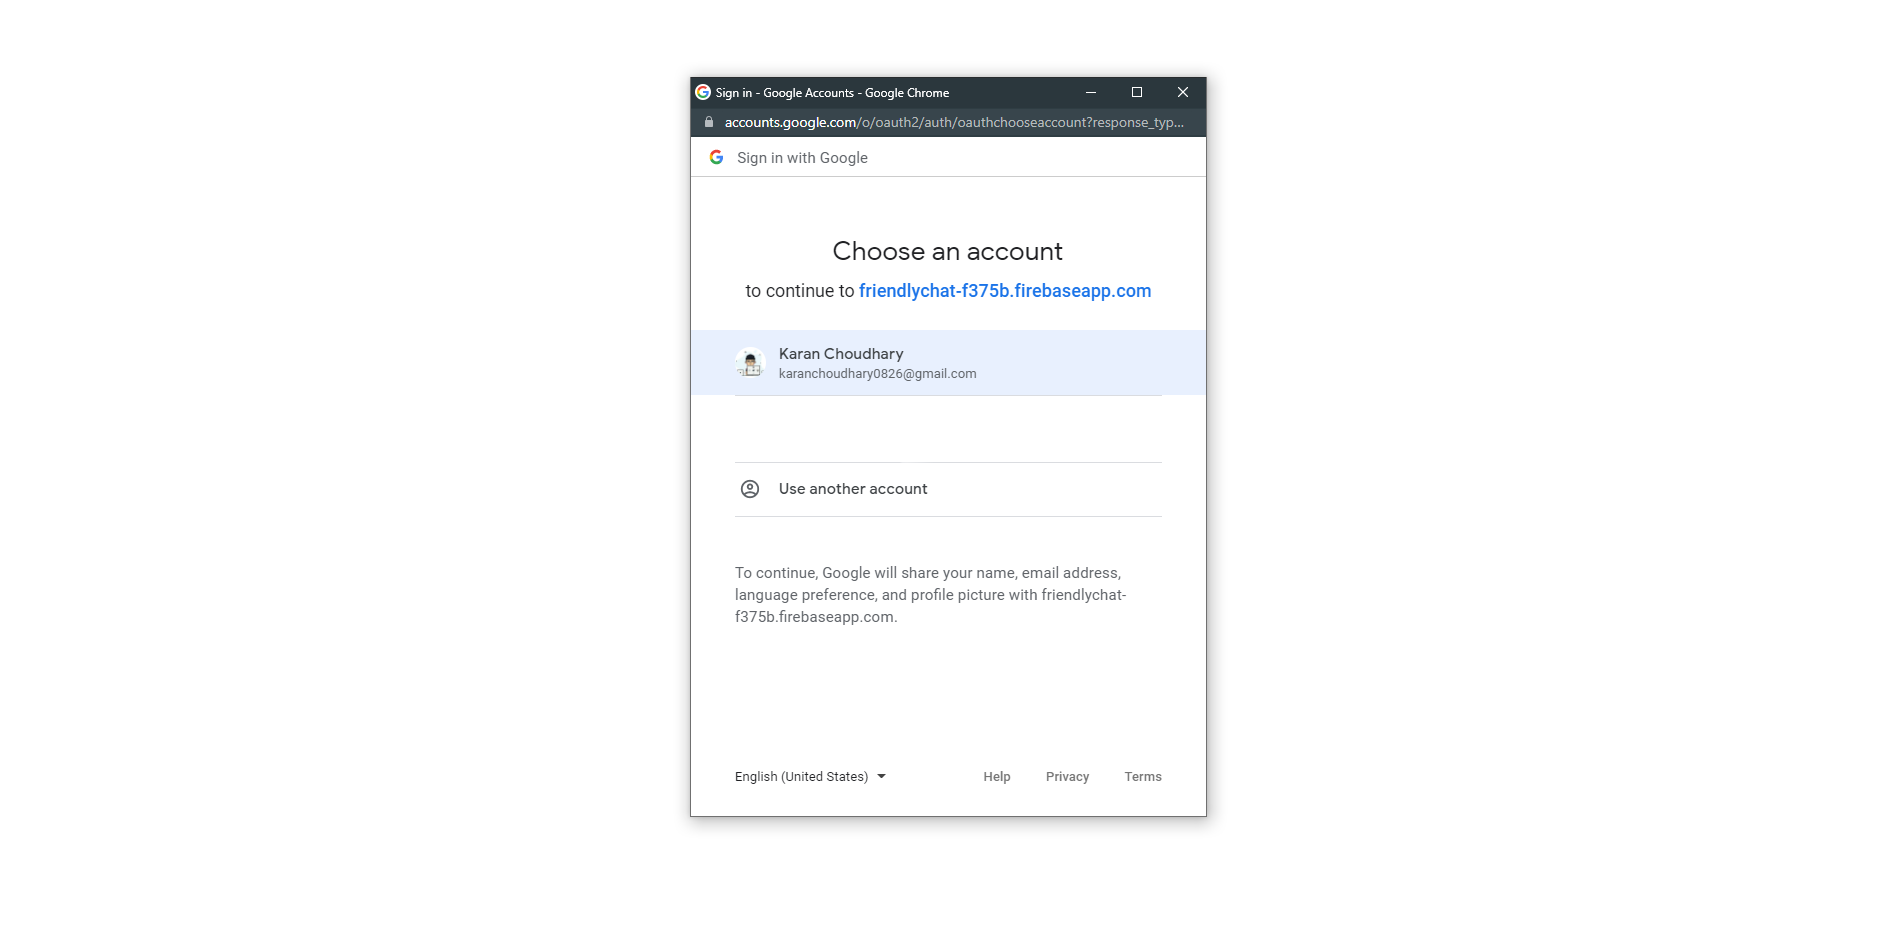 And it seems like everything is working fine.✔
 Now, go to firebase console and open up your firebase project and go to Authentication > Users.
 We can see a that a new user is added✨.
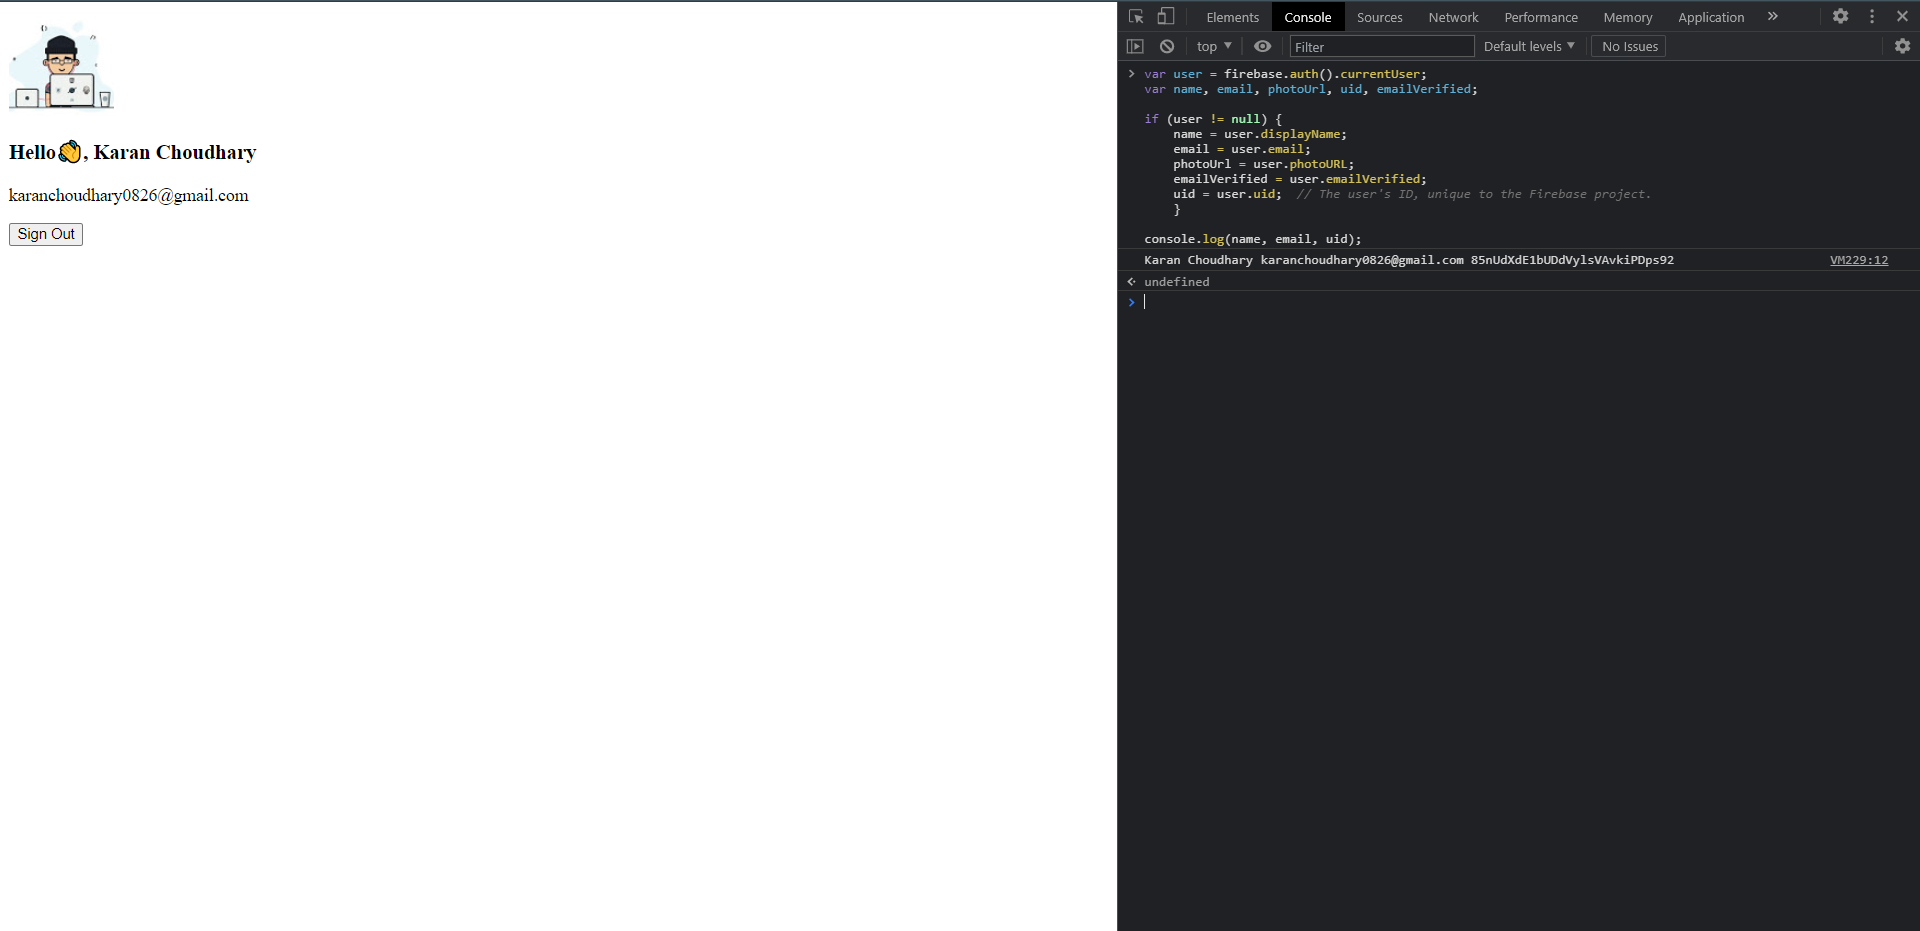
Let's do another check by logging the user details in the console using console.log()
Copy and paste the following code in the console:
var user = firebase.auth().currentUser;
var name, email, photoUrl, uid, emailVerified;

if (user != null) {
    name = user.displayName;
    email = user.email;
    photoUrl = user.photoURL;
    emailVerified = user.emailVerified;
    uid = user.uid;  // The user's ID, unique to the Firebase project.
    }

console.log(name, email, uid);
If everything is right it should log my details in the console.
 That's pretty much it! Congratulations. You've just setup Google Authentication using Firebase🥳
Wrap Up
So that's it. Hope you enjoyed the article. Feel free to share your thoughts in the comment section below. Any feedback is greatly appreciated.
Feel free to the check out my GitHub: https://github.com/itskaranchoudhary
Star the repo⭐: https://github.com/itskaranchoudhary/firebase-auth-app
Find the NPM Package here: https://www.npmjs.com/package/firebase-auth-app